이전 글 : https://kmyobin.tistory.com/77
Spring boot <-> Android 연동하기 (2) MySQL에 있는 모든 데이터를 가져와서 Android 앱에 출력하기
이전 글 : https://kmyobin.tistory.com/76 Android 연동하기 (1) 데이터 넣고 확인하기" data-og-description="이전 글 : https://kmyobin.tistory.com/75 MySQL 연동하기" data-og-description="spring boot 작..
kmyobin.tistory.com
전에는 MainActivity에서는 User 등록을 하고, UserListAcitivity에서는 User들의 정보를 출력하였었다.
이번에는 UserListAcitivity를 기본 창으로 정하고, FAB를 눌렀을 때 UserForm(MainActivity)의 새로운 창이 떠서 User 등록을 하는 형식으로 바꿀 것이다.
그리고 뒤로 가기를 누르면 UserListAcitivity에서 방금 등록한 User 정보도 출력하게 만들 것이다.
1. MainActivity -> UserForm 바꾸기
2. FAB 생성하기
3. UserListAcitivity에 FAB 추가하기
4. 실행하기
1. MainActivity -> UserForm 바꾸기
일단 MainAcitivity의 이름을 바꾼다. UserForm으로

참고로 AndroidManifest.xml 파일에 있는 이름도 바꿔야한다.
2. FAB 생성하기
list_user_item.xml으로 가서 UI를 좀 다듬어준다.
<View
    app:layout_constraintTop_toBottomOf="@+id/userListItem_Password"
    android:layout_width="match_parent"
    android:layout_height="0.5dp"
    android:background="#c2c2c2"
/>
딱히 차이는..
그 다음 activity_user_list.xml 로 가서 FAB(FloatingActionButton)을 만들어준다.
<?xml version="1.0" encoding="utf-8"?>
<androidx.constraintlayout.widget.ConstraintLayout xmlns:android="http://schemas.android.com/apk/res/android"
    xmlns:app="http://schemas.android.com/apk/res-auto"
    xmlns:tools="http://schemas.android.com/tools"
    android:layout_width="match_parent"
    android:layout_height="match_parent"
    tools:context=".UserListActivity">

    <androidx.recyclerview.widget.RecyclerView
        android:layout_width="match_parent"
        android:layout_height="match_parent"
        android:id="@+id/userList_recyclerView"/>

    <com.google.android.material.floatingactionbutton.FloatingActionButton
        android:layout_width="wrap_content"
        android:layout_height="wrap_content"
        android:layout_margin="20dp"

        app:layout_constraintBottom_toBottomOf="parent"
        app:layout_constraintEnd_toEndOf="parent"
        android:id="@+id/userList_fab"
        android:src="@android:drawable/ic_input_add"/>

</androidx.constraintlayout.widget.ConstraintLayout>
우측 하단에 생성해주었다. button의 id는 userList_fab이다.
3. UserListAcitivity에 FAB 추가하기
이제 이 버튼을 UserListActivity에서 다뤄줄 것이다.
fab 버튼을 누르면 UserForm 창이 뜨면서 User 등록을 한다.
save 버튼을 누르면 save success가 뜨고, 뒤로 가기를 누르면 list에 방금 등록한 user 정보가 업데이트 되어있게 만든다.
package org.techtown.spring_mysql_ex;

import androidx.appcompat.app.AppCompatActivity;
import androidx.recyclerview.widget.LinearLayoutManager;
import androidx.recyclerview.widget.RecyclerView;

import android.content.Intent;
import android.os.Bundle;
import android.widget.Toast;

import com.google.android.material.floatingactionbutton.FloatingActionButton;

import org.techtown.spring_mysql_ex.adapter.UserAdapter;
import org.techtown.spring_mysql_ex.model.User;
import org.techtown.spring_mysql_ex.retrofit.RetrofitService;
import org.techtown.spring_mysql_ex.retrofit.UserAPI;

import java.util.List;

import retrofit2.Call;
import retrofit2.Callback;
import retrofit2.Response;

public class UserListActivity extends AppCompatActivity {

    private RecyclerView recyclerView;

    @Override
    protected void onCreate(Bundle savedInstanceState) {
        super.onCreate(savedInstanceState);
        setContentView(R.layout.activity_user_list);

        // 기본적인 recyclerview 설정
        recyclerView = findViewById(R.id.userList_recyclerView);
        recyclerView.setLayoutManager(new LinearLayoutManager(this));

        FloatingActionButton floatingActionButton=findViewById(R.id.userList_fab); // new code
        floatingActionButton.setOnClickListener(view -> {
            Intent intent= new Intent(this, UserForm.class); // 새로 작성하는 userForm이 나옴. 이게 Register면 되겠다
            startActivity(intent);
        });

        loadUsers();
    }

    private void loadUsers(){
        RetrofitService retrofitService=new RetrofitService();
        UserAPI userAPI=retrofitService.getRetrofit().create(UserAPI.class);
        userAPI.getAllUsers()
                .enqueue(new Callback<List<User>>() {
                    @Override
                    public void onResponse(Call<List<User>> call, Response<List<User>> response) {
                        populateListView(response.body());
                    }

                    @Override
                    public void onFailure(Call<List<User>> call, Throwable t) {
                        Toast.makeText(UserListActivity.this, "Failed to load users", Toast.LENGTH_LONG).show();

                    }
                });
    }

    private void populateListView(List<User> userList){
        UserAdapter userAdapter=new UserAdapter(userList);

        recyclerView.setAdapter(userAdapter);

    }
}Intent를 설정하여 startActivity로 새로운 창을 띄워준 모습이다.
여기서 AndroidManifest.xml 파일을 들어간다.
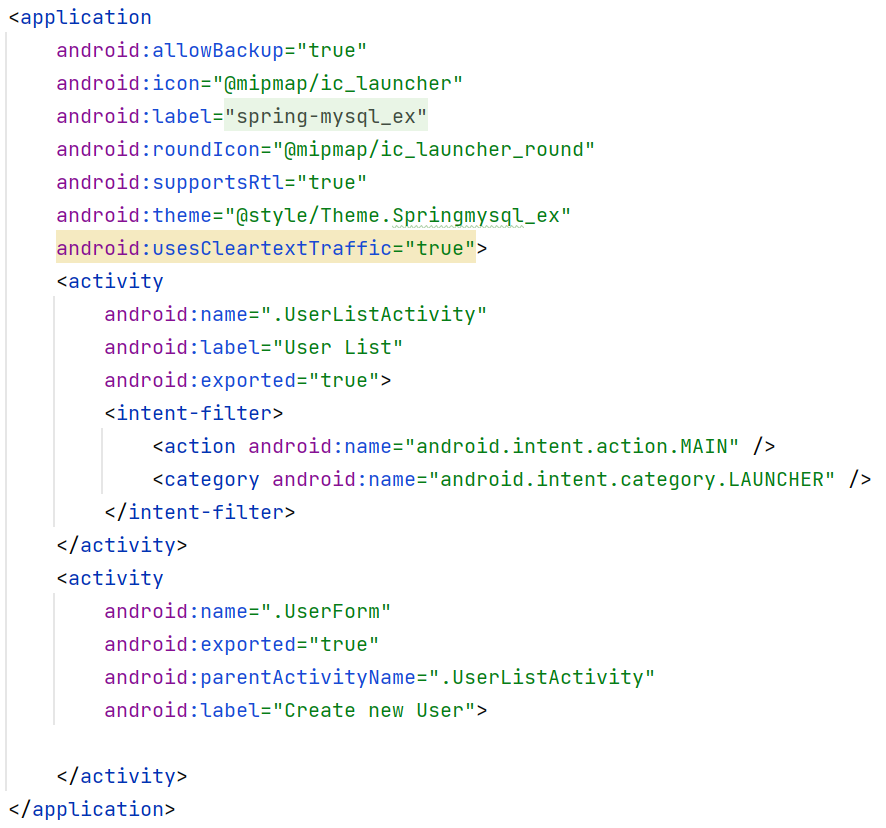
UserForm의 parentAcitivityName을 UserListActivity로 설정한다. 그리고 label을 이용해 상단에 보이는 이름들을 바꿔준다.
4. 실행하기
spring boot 서버를 키고 안드로이드 앱을 실행한다.

우측 하단에 버튼이 새롭게 생기고, 상단에 label도 바뀐 것을 볼 수 있다.
이제 버튼을 클릭하면

UserForm 창이 새롭게 뜨게 되고, parentActivityName을 설정해놔서 뒤로 가기 버튼이 생긴 것을 알 수 있다.
여기서 data를 입력하고 save를 눌러보자

Save Success가 뜬 모습이다.
그럼 좌측 상단에 있는 뒤로가기 버튼을 눌러서 list에 방금 추가한 user 정보가 출력되는지 확인하자.

확인 완료.
여태까지 유튜브를 보며 따라해온 것이고, 회원 정보 삭제와 수정은 내가 다시 해봐야겠다.
'SPRING BOOT' 카테고리의 다른 글
| Amazon S3 <-> Spring boot 연동하기 : bucket에 있는 객체 불러오기 (0) | 2022.11.20 |
|---|---|
| Spring boot <-> Android 연동하기 (2) MySQL에 있는 모든 데이터를 가져와서 Android 앱에 출력하기 (0) | 2022.10.09 |
| Spring boot <-> Android 연동하기 (1) 데이터 넣고 확인하기 (0) | 2022.10.09 |
| Spring boot <-> MySQL 연동하기 (0) | 2022.10.08 |


댓글